Throughout the year, when the nails are just a little longer, there is an urge to do nails. Making good-looking and high-quality nails can cost a big meal, and many times just make a few days, you accidentally rub the nails for some defects. It’s also possible that after a few days there will be no freshness. In your free time, you will mess up your nails.
This time is definitely distressing, and you secretly thought that you will never do nails next time, but you can’t escape the “True Incense” law.

In fact, if you want to make nails, you don’t need to go to a nail shop. You can prepare your own tools at home, and you can do it yourself every time you want to make nails. Although the preparation of the tools in the early stage will be more expensive than going out to make a nail once, after several times, you will find a lot of savings. And you can make the shape according to your preference, and the nail polish you buy is also guaranteed.

When it ’s all right, it ’s a pleasure to meet your girlfriends and draw some beautiful nails with each other.
Nail Cleaning
Preparation tools: nail file, steel push, dead skin fork, sponge rub, dust brush

Before applying nice-looking nail polish, you must first clean up your nails, just as between makeup, and also make sure that your face is clean. .
First, you need to use a nail file to repair your favorite nail type, which is usually a round oval, and French nails have straight nail edges. When using a nail file, pay attention and slowly and slowly repair it, but don’t damage your nails because of anxiety.

After repairing the nail type, use a steel push to clear the dead skin on the nail cover from outside to inside. If there is dead skin on the edge of the nail, use a dead skin fork to remove it.
Then use a sponge to polish the surface of the nails. Remember to polish the corners to ensure the beauty of the nail. The dust left by sanding is easily and cleanly removed by the dust brush.
Nail Polish
Once you have cleaned your nails, you can start to look good. Before applying the color, the first step is to apply the primer. The primer only needs a thin layer. When applying, be careful not to apply it to the skin. After applying the primer, bake with a phototherapy machine, and then there will be a baking step. During this period, do not touch the nails with your hands.

About two minutes or so, after the primer is dry, apply color glue and choose your favorite color. It is the same as the primer, apply a thin layer, and then stretch into the phototherapy machine to bake. After repeating this step 2-3 times, the color of the nails will become full and beautiful.

After applying the color glue, start to apply the reinforcement glue, and then continue to dry for 2 minutes. Reinforcing glue makes nails thicker and prevents falling off.
Finally, a thin layer of the no-wash seal is applied, and the nails that are originally frosted become instantly shining, and the damage to the nails such as washing hands is usually avoided.
Decorate Nails
Preparation tools: point pen, nail polish, glue, diamond, small flower, trinket

The above is the method for making solid nails. If you want to draw a nice pattern for your nails and point a glittering diamond, then you need to do these tasks after the steps of applying color glue.
First, you need to prepare a drilled pen, soak the tip with a little water and fix the diamond, small dried flower, or small decorative pattern of personality to the position you think looks good. If you want to paint by yourself, you must prepare nail polish or painted glue in advance, and use the tip of a point drill pen to draw (a toothpick can also replace the point drill pen).

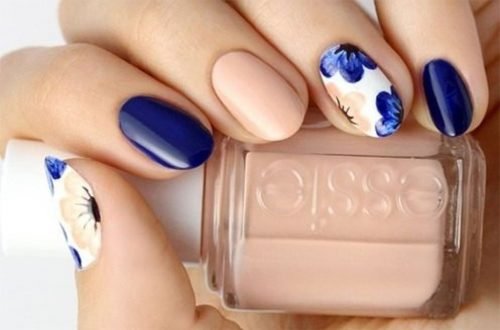
A beautiful nail is done through your own efforts! The effect will actually be good.
I hope guys like this small tutorial.